It can be confusing and time consuming to organize and view AVCHD and MTS files on Mac OSX. Here we explain AVCHD, how it works on Mac OSX, and tell you how you can view and organize these files.
Overview
Mac OSX does not handle the AVCHD format or it’s internal MTS files very well, when it handles them at all.
Making matters worse, the AVCHD format is becoming a more ubiquitous video format by the day. More and more DSLR’s are offering 50/60fps 1080p video and even point and shoot cameras like the Panasonic Lumix LX7 are getting into the fray.
When you plug that camera into your Mac, and expect it to work like any other video file is when you run into the problems. AVCHD files are not supported on Mac OSX 10.7 Lion and below at all. OSX 10.8 Mountain Lion and above handle them in an unexpected and klunky way (more on this later). If you extract the MTS files from the AVCHD file, OSX doesn’t handle them at all, which means no Quicktime, iPhoto, or Aperture support either.
At some point, we expect Apple to resolve all of this with better support for this format. Between now and then, there are strategies you can employ to manage and view your files without pulling out your hair. We will tell you how to extract the MTS files, and how to view them with other programs like VLC or convert them to formats (like MP4) your current programs will understand.
What is AVCHD?
AVCHD (Advanced Video Coding High Definition) is a format for digital recording and playback of high-definition video developed jointly by Sony and Panasonic.
Originally created in 2006 for professional use, it began appearing in high end consumer camcorders in the late 2000’s and eventually DSLRs as a means to capture HD video. AVCHD is accepted as an excellent format for capture of high frame-rate video, and is almost identical to the format used internally on Blu-ray discs.
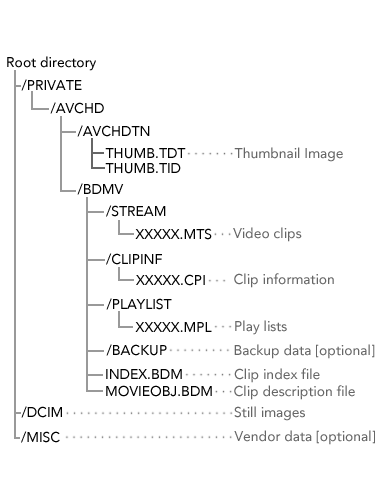
An AVCHD file is actually not a single video file, but a hierarchical file structure derived from the file structure you would find on a Blu-ray disc, containing multiple video clips.
It’s similar in that way to the internal structure of an iPhoto Library, which may be why Apple chose to handle it sort of like an iPhoto Library (more on that later).
Viewing AVCHD files in Finder
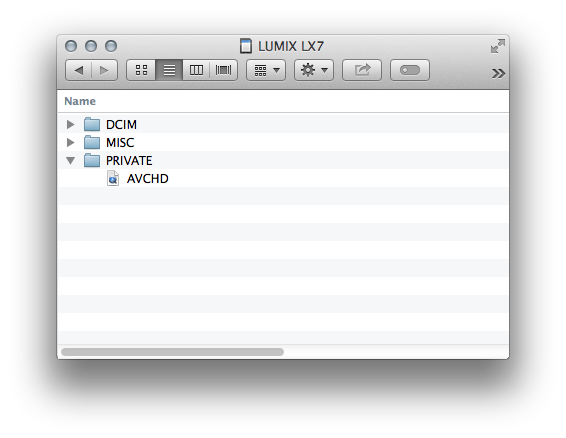
When you connect your video camera to your Mac via USB, or plug in your SD Card into your Mac, you will see some but not all of the files we described above. In particular, you will see a file PRIVATE/AVCHD, instead of a folder.
On OSX, the AVCHD folder is automatically viewed as a package (aka bundle). If you are not familiar with packages on OSX, a package is a file system folder that is normally displayed in the Finder as if it were a single file. A package can contain hundreds of other folders and files and such. An iPhoto Library is a package, for example. In addition, OSX further treats the BDMV folder as a package as well.
As with all packages, you can right-click (ctrl-click) on the package file, and choose ‘Show package contents’ to view what is inside these packages, and eventually make your way down to the MTS video files.
The Problems with macOS and AVCHD / MTS
The problems with AVCHD and MTS files on OSX are numerous.
In short, it is dreadful to try to view, organize, and manage these files on OSX, because Apple does not provide adequate tools to do so.
Below is a summary of just a few:
Poor Quicktime Support for AVCHD
You can watch AVCHD in Quicktime, but it comes with a lot of asterisks.
You can double click the AVCHD file, and it will play the video, but only on OSX 10.8 Mountain Lion or higher.
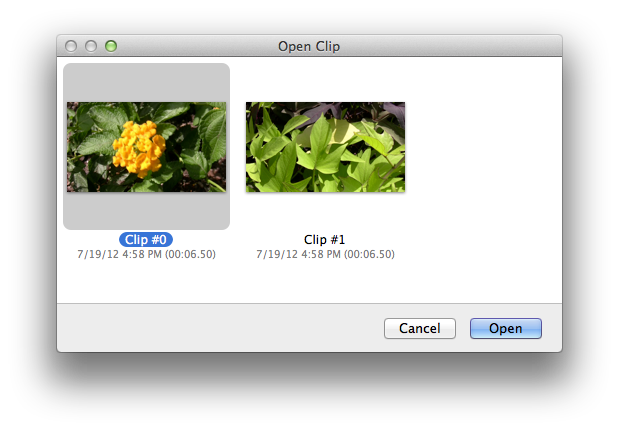
Also, if there are multiple video clips in the AVCHD file, Quicktime will show you a list of thumbnails for each video, and then require that you select one before viewing it.
AVCHD Packages Cannot be Renamed
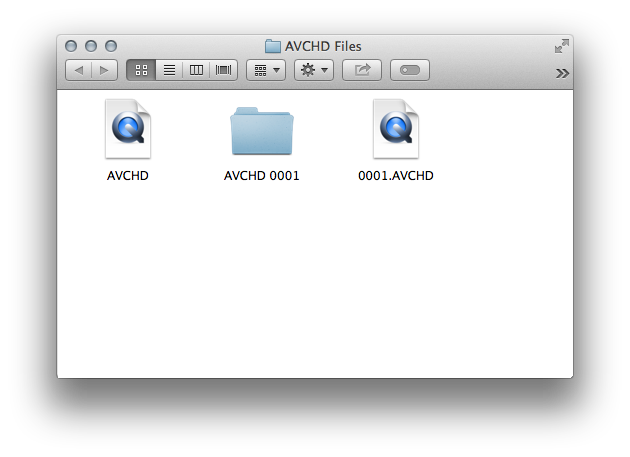
If you rename an AVCHD package to anything other than ‘AVCHD’, Quicktime will no longer play the videos within the AVCHD package.
This means that all AVCHD files will have the same name, and will not be able to co-exist in the same folder, and thus, organizing these files requires them each to have their own folder.
Yikes.
AVCHD Packages Contain Multiple Videos
Each AVCHD file contains all of the video clips that are on your camera at import time. Those various clips may span different dates, places, events.
So how is one to then organize the AVCHD file? Should it go in November, or December? Wedding or Birthday? Vail, or New York?
AVCHD Packages Are Bloated
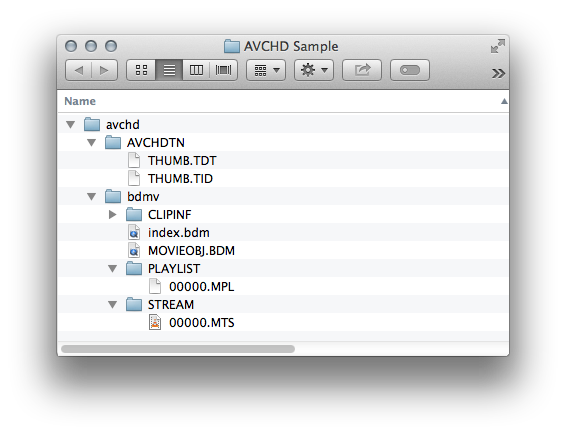
Each AVCHD package contains playlists, thumbnails, and other clip information you likely do not care about.
These files are only used with an AVCHD player; which you are not likely to ever use.
The result is that these unused files will take up valuable space unnecessarily on your hard drive.
Extracting MTS Files is Tedious
Manually extracting MTS files is a 10 step process for each AVCHD file.
1. Import an AVCHD package
2. Open finder
3. Find the AVCHD package in Finder
4. Right-click the AVCHD package
5. Choose ‘show package contents’
6. Find the BDMV package in Finder
7. Right click the BDMV package
8. Choose ‘show package contents’
9. Find the STREAM folder in Finder
10. Select all of the MTS files
11. Copy the MTS files to a new location
A time consuming process, to say the least.
No Quicktime for MTS Files
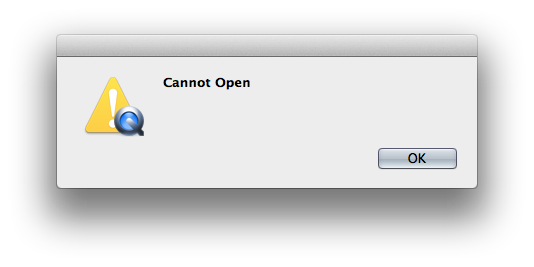
If you extract the MTS files from the AVCHD file, quicktime will not be able to read it.
Quicktime doesn’t support MTS files at all, on any version of OSX.
How to View and Organize AVCHD / MTS Files on macOS
In our view, the best course forward is to extract the MTS files.
This approach allows you to shed the bloat from the AVCHD files, as well as organize them how you would normally do so, whether that be by date, event, or otherwise.
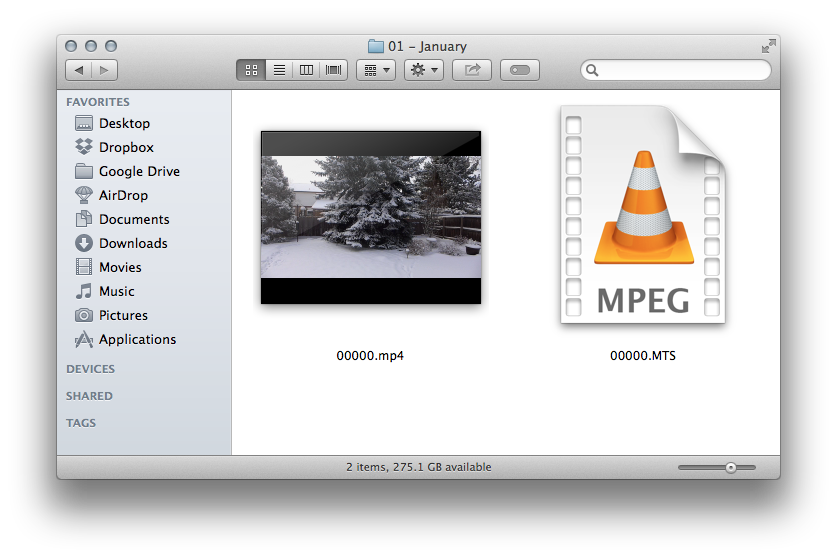
Once you have extracted the MTS files, you can either losslessly wrap them in an MP4 container so you can view them through Quicktime, or use an alternate program to view them until Apple adds better support in the future.
Extracting MTS Files Automatically
You can manually extract your MTS files using the ten step process mentioned above, but it doesn’t have to be that hard.
Silent Silent can automatically extract your MTS files, and even some of the CLIPINFO or other files if you want to retain them as well.
With Silent Sifter, every time you connect your camera, it will automatically import your AVCHD packages, extract the MTS files, and organize the MTS files in your output folder according to your preferred folder structure.
Here is how:
Install Silent Sifter
You can download the full version from the Mac App Store.
Launch Silent Sifter
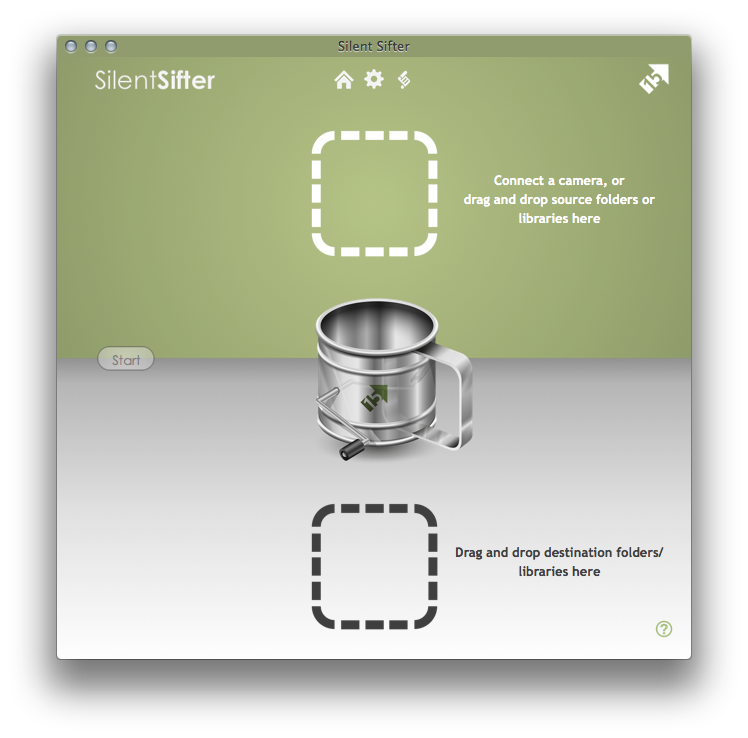
After launch, you should see Silent Sifter with an empty input and an empty output, which you will configure in the next few steps.
Add Input Camera
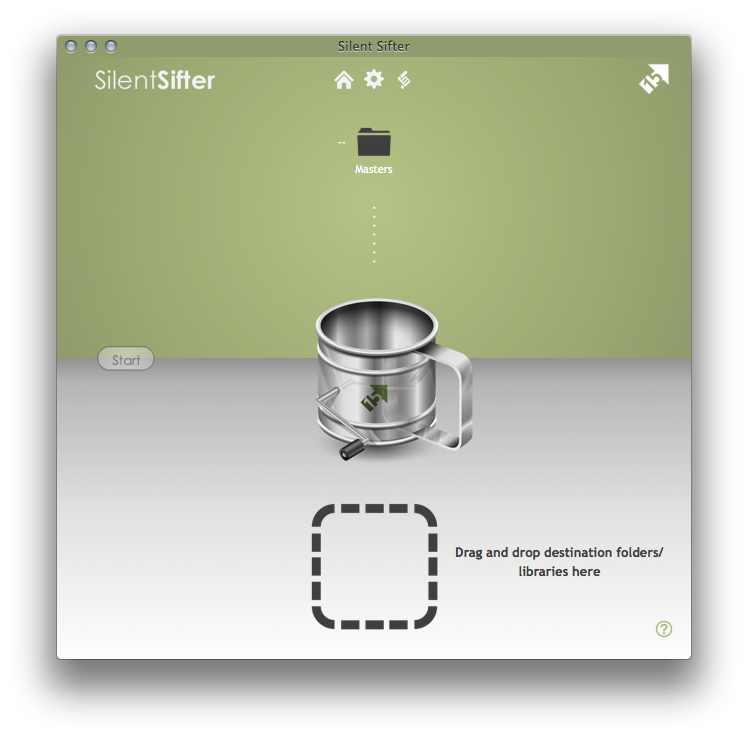
Just connect your Camera to your Mac via USB cable while Silent Sifter is running, and it will automatically be detected and added as an input.
Add Folder Output
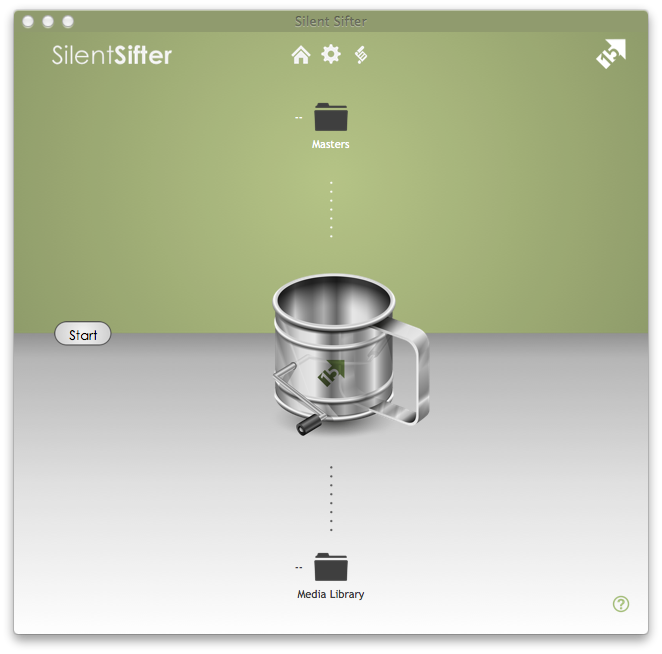
Create a new folder where you want your simple folder structure to be located, and drag it into the white output area.
Customize (optional)
By default, Silent Sifter will organize files by Type (Photos/Videos), then by Year, then by Month.
Now is your chance to customize if you like. You can customize the folder structure, add and customize the file renaming, filter out some files.
To customize, click on the output folder, press the ‘edit’ button, and use the advanced screen to configure Silent Sifter as you like. Learn more on the
User Guide for Silent Sifter.
Sift
Press the sift button on the home screen, and Silent Sifter will import all of the photos and videos from the camera, extract the MTS files, and then copy them to the new output folder into an organized folder structure.

Viewing MTS Files with VLC

Although Quicktime does not support MTS files, the VLC Media Player application is an excellent alternative.
Just download and install VLC Media Player, and you will be able to double click any MTS file in Finder to view it in VLC.
Converting MTS Files Losslessly to MP4

If you aren’t afraid to use the Terminal, you can easily convert your MTS files into MP4s.
Once you have converted the MTS files into MP4s, you will be able to view them in Quicktime and most any other program.
Best of all, this conversion is fast, lossless, and uses the freely available utility ffmpeg.
1. Download ffmpeg
You can download ffmpeg from many sites, but most of them require that you build the code yourself.
We will avoid that by downloading a pre-built version from ffmpegmac.net
2. Install ffmpeg
Once you’ve downloaded the zip file in step 1, double click it to unzip the ffmpeg binary file.
Once the ffmpeg file is unzipped, you will need to find a permanent home for this script. For the purposes of this post, we will assume that is your desktop, although many people will use a /bin folder off their home directory.
In Finder, locate the ffmpeg file, and copy it to your desktop.
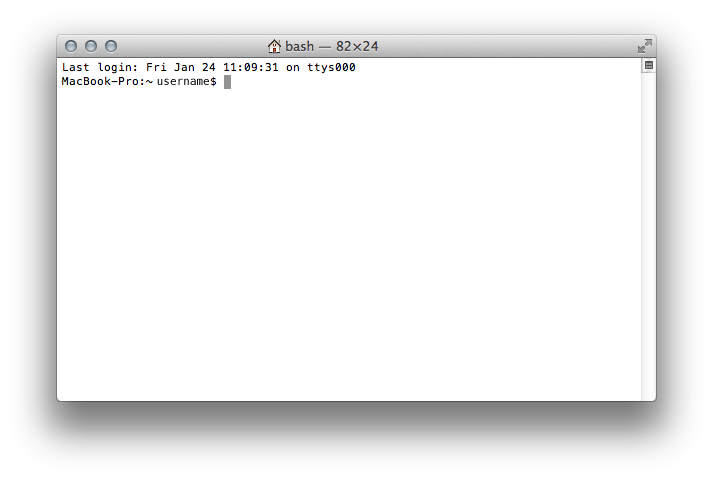
3. Open Terminal
Open the terminal application, in order to get a command line prompt.
4. Locate the MTS File to convert in Finder
Open the Finder, and locate the MTS file you would like to convert, so that you can drag it into the Terminal window in the next step.
5. Run ffmpeg on the MTS File
Next, you will run the following command on the MTS file to re-wrap your MTS file in an MP4 container using ffmpeg. The specific command that we will use will look something like the following:
ffmpeg -i sampleAVCHD.mts -vcodec copy -an -f mp4 myfile.mp4
In our case, we will type just the first portion into the terminal
./Desktop/ffmpeg -i
Then we will drag the MTS file from finder into terminal, to insert the full path to the MTS file into the command.
next we will type the next portion of the command:
-vcodec copy -an -f mp4
Finally, we will drag the MTS file back into the window a second time, and delete the 00000.MTS, replacing it with 00000.mp4
Finally press enter in the Terminal to run the command. A new 00000.mp4 file will appear alongside the MTS file, and you will be able to view the MP4 file in Quicktime any many other programs.